I have an employees table.
Because it’s 1984, HR has decided we need to know Twitter handles, Facebook pages, and who knows what else.
So let’s add it to our table.
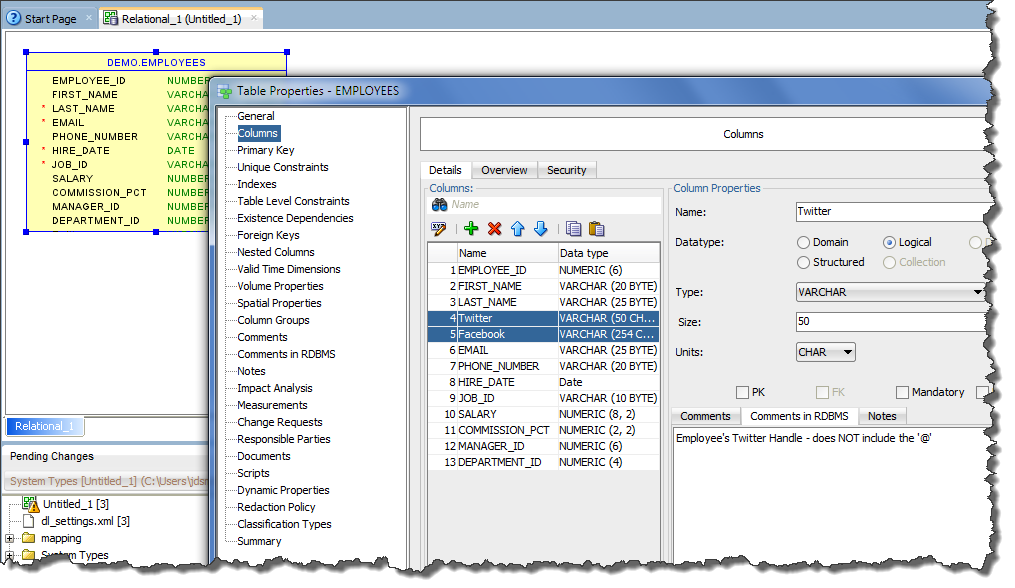
The dialog by default puts new columns at the bottom of the table. We’ll see why in just a moment.

On a side note, we’re not super fond of these ‘arrow’ buttons to launch the compares. I don’t think they’re as intuitive as they could be, but I digress…
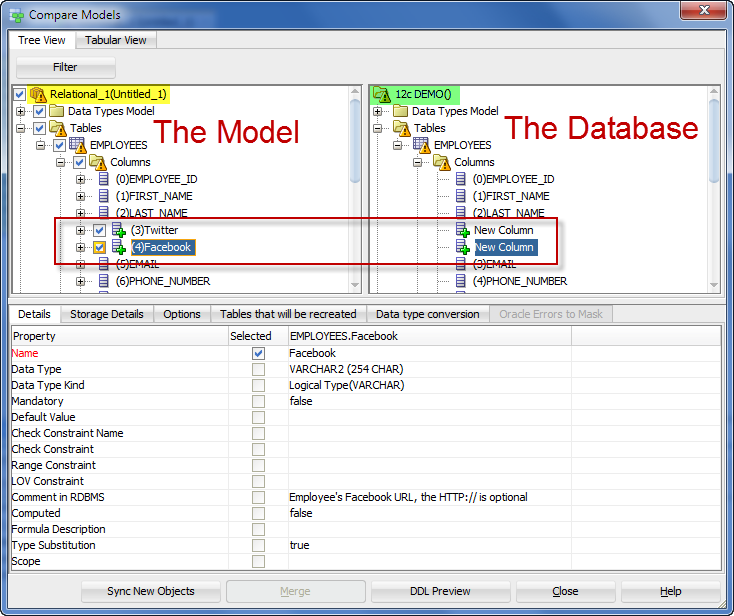
Now. What type of code will these changes require? Hit the ‘DDL Preview’ button.

So we’re renaming the table. We’re creating a new version of the original table with the column order you’ve specified in the model. And we’re copying the old data over. And we leave the temp copy of the table there for you to look after when you’re done.
Do you understand now, why we are a bit reluctant to put a ‘run this code against my database’ button in the tool? Running this in a dev or test environment would be just fine. In production, not so much.
But wait, maybe I don’t REALLY care that much what the column order is in the database. Maybe there’s an option?
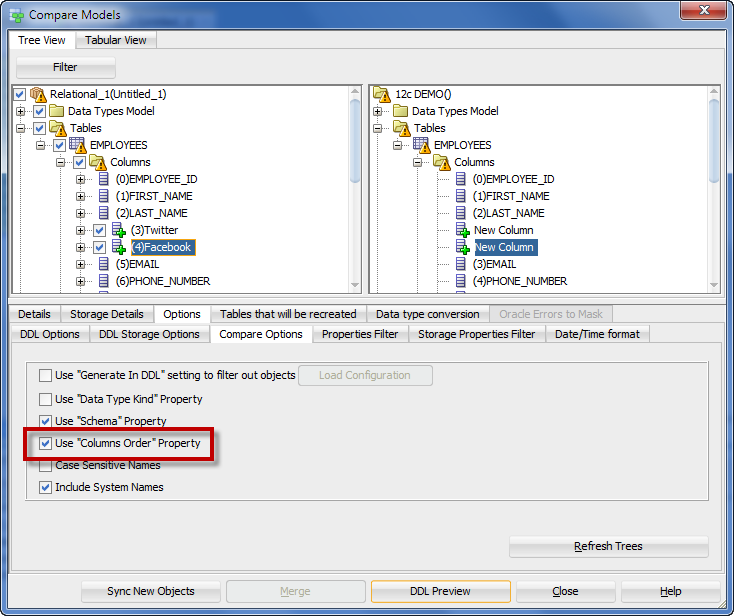
Uncheck this option, click the refresh button, and spin up the code again.
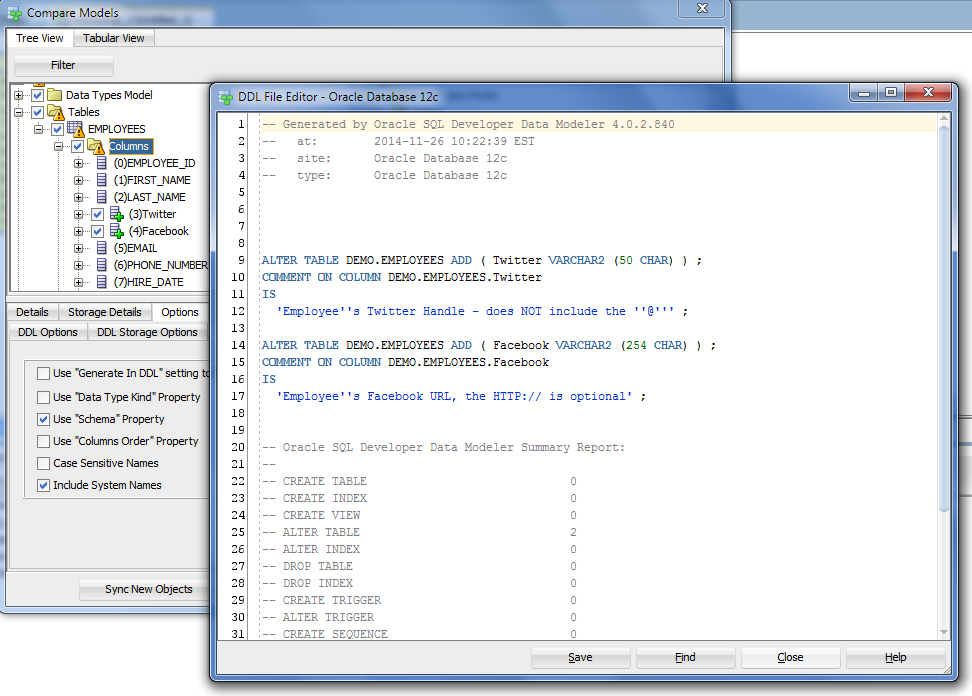
That looks a lot simpler and a LOT less destructive.



3 Comments
I have realized that such behavior appears when within the same dmd file where a relational model exists and the columns are copied (drag & drop) to a new relational model. In the new model the tables are locked, in the old not. So is there a way to unlock the tables in the new model?
You’re linking them, so they’re defined in the base/original design.
You can literally copy and paste columns between designs.
Above example is for new tables. But what about when modifying existing models. It seems to me that all tables in the existing model are locked, I see a lock icon in top left corner of each table. However in the same model if I try to create a new table I can modify it and add new columns and so on. So how to unlock an existing table?